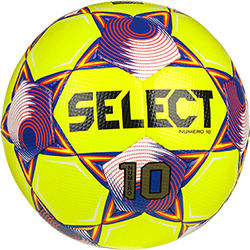
You took the time to research what to look for when choosing a soccer ball, you made your purchase, and your beautiful new ball has arrived. Now you're wondering to yourself; 'how do I care for it." Everyone wants to get the best performance out of their soccer equipment. Here are a few easy steps to follow in order to get the most out of your new ball.
Prepare For First Inflation
This is a very important part of caring for your soccer ball. Properly preparing for your first inflation sets your ball up for the best possible performance and will increase its longevity.
Before putting your inflation needle into the ball's valve stem, to loosen the bladder on the inside gently unfold the ball as much as possible. You should be able to feel the bladder moving freely inside when you press down with your hands or shake the pre-inflated ball. The only point where the bladder is not free should be where it meets the valve.
Initial Inflation
After the bladder is loosened, place 1 or 2 drops of valve oil into the valve stem, or onto the inflating needle. After inserting the needle into the valve, move in/out and spin it around to ensure the valve is fully coated in oil. Doing this ensures that the valve will seal properly to prevent premature air loss. When inserting the needle valve oil also helps remove any debris from within the valve which could cause damage. Built up debris within the valve can lead to a dry or damaged valve which will cause the ball to loose air quickly. Sometimes a dry/damaged valve can be revived with valve oil.
IMPORTANT: when first inserting the needle into the valve be careful not to push too hard as you could accidentally puncture the bladder!
Now inflate your ball slowly to the recommended pressure setting range. Most soccer balls have a pressure range of about 10-12 PSI. If you are unsure what pressure range is recommended for your ball, check for writing on the ball around the valve for exact specifications. It is best to use a pressure gauge to measure PSI within the soccer ball. If you don't have one handy, a good rule of thumb is, when properly inflated, with your thumbs on either side of a ball you should be able to push in about 1/2" on both sides.
Inflating your ball slowly allows the bladder to conform its shape to the outer cover. Inflating too quickly can lead to bladder damage resulting in a warped ball.
SS PRO TIP: For a soccer ball that responds better for control, inflate to lowest recommended PSI setting. For a soccer ball that responds better for power, inflate to the maximum recommended PSI setting.
Let your ball rest at recommended pressure for 24 hours before using for training or a match. This allows the bladder and cover to adjust and settle to its new pressure level and ensures optimal shape and performance. Make sure to double check the pressure after the 24 hour settling period to verify it is within your ball's recommended PSI range. This same principle applies if you are inflating after the ball has been stored in a cold temperature (like a garage or car trunk in the winter). Let the ball rest in a room temperature location for 24 hours before inflating.
Cleaning Between Uses
It is recommended, but not always necessary to clean your soccer ball between every use. The amount of dirt/debris and marks/stains might not be enough to justify the time to clean your ball. However, any soccer ball used on a regular basis and for extended periods of time should be regularly cleaned. The reason for this is to help maintain the surface feel of the ball and to help extend the life of the ball cover (outer lining). Built up debris will invariably increase the wear speed of any ball.
Using lukewarm water, take a mild mixture of dish soap with a sponge and gently scrub the entire ball. For areas where build up is high, use a Brillo-type scrubbing pad to gently scrub away debris and stains. Wipe excess water with a towel and let dry in a dry and airy room-temperature environment for several hours. Although it is tempting, never place on or near a heat source (register, vent, radiator, etc.).
Never use harsh detergents or chemicals to clean your soccer ball as these could have a negative affect on the cover and stitching.
Re-inflating Each Time
It is totally normal for soccer balls to gradually loose air over the course of a few days to several days after proper inflation. This is especially common in higher-end balls where the bladder material is naturally more porous. For that reason it is important to top off the air in your ball just before using each time. When you re-inflate, always make sure to check PSI with a gauge, or if you must, go by the rule of thumb mentioned above.
When re-inflating it is always a good practice to add 1 or 2 drops of valve oil to the soccer ball valve or inflating needle.
We also recommend using a ball pump that has a flexible hose leading to the needle. Pumps that have needles screwed directly into the pump body create more stress on the valve when moving during pumping and have a greater chance of having the needle break off in the valve during pumping.
SS PRO TIP: Under-inflating a soccer ball will not cause damage when in use while over-inflating can.
SS PRO TIP: Changes in temperature can drastically affect your ball's pressure. For this reason it is especially important to check pressure before a match to ensure proper inflation.
Storage
Between uses it is recommended you store your soccer ball in a dry airy room-temperature location. Don't leave it in a hot or cold car trunk, or outside exposed to the elements. This is especially important if you live in a wet climate and often come home from training or matches with wet equipment.
When storing for extended periods of time it is best to reduce the pressure of the ball and leave in a dry location at room temperature. Temperature fluctuations cause stress on the materials which will speed up the wear of your ball.
Another way you can extend the life of your soccer ball is to reduce air pressure between uses. Doing this helps reduce stress on stitching. It might not be practical for your everyday training soccer balls but is recommended for your high-end match balls.
Warranties
Most balls made by reputable manufacturers come with a warranty to protect the consumer from manufacturer's defects. The most common defects that pop up are bladder and cover stitching related. Be sure to consider if the ball you're purchasing comes with one of these guarantees. You can take perfect care of your ball, but if it is defective from the start, no amount of general care will make it last.
Conclusion
Follow these simple steps above to care for your soccer ball and you will be rewarded with a ball that stands the test of time and operates at peak performance throughout! And by the way, don't sit on your ball unless you want to risk warping it!
Click here to check out our extensive selection of the best soccer balls available for all levels of play. Soccer Command has training balls and match balls from Diadora, Select, Brine, Nike, Under Armour, hummel, and more


3 comments
Abhinav
Hi! It was a very nice initiative to provide information like this. Actually, please do me a favor. Please make an informative blog on how to remove the inflating needles out of the soccer ball.
I really need it.
Thank You
Abhinav
Barry
What kinds of oil can you recommend are good/safe to use for lubricating the valve/needle? Mineral oil..? Is Glycerin oil found in pharmacy section good to use, or is it too thick? Thanks for your time and input.
Mark
I really never realized there were ways to take care of a soccer ball, this was very informative for me thank you. My son is playing for the high school team and I want to get him some good gear; cleats, a ball, and some great shin guards. So this is great. I have been happy shopping at Soccer Garage and am wondering if you have cleats you suggest?